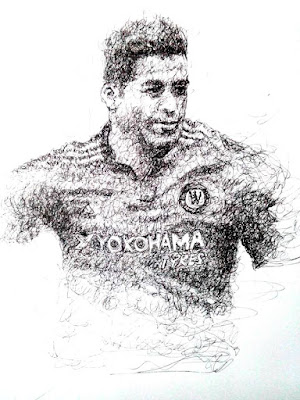
Pencil Portrait Drawing Tips on Hair
Drawing hair is not all that difficult but it does take quite a bit of time to make the result to look real and natural. In fact, it usually takes two to three times longer to do the hair than it does to do the rest of the portrait. So, do not get frustrated and know that you will have to spend the time.
Here are some pointers to help you succeed at drawing the best hair possible:
* Line Drawing - As always, the first step is to produce a line drawing that shows the overall shape of the hair and maps out some of the main value areas. At this stage, you should look at the hair as a shape and ignore all details such as strands. Do observe however how the hair flows, i.e., take note of the growth directions of the hair.
* Values - Next, using the map you created on your line drawing, start laying in the major values, i.e., the major darks and lights. Make sure you always follow the growth direction of the hair. This is very important. Follow the flow.
* Blending - At this stage, you can blend the darks out towards the lights. Then, reapply the darks and pull them into the light areas using a tortillon or a pencil (if there is not enough graphite on the paper). Work from the dark areas into the light areas. After that, use a pointed kneaded eraser as a drawing tool to pull the lights into the darks.
This process should be repeated several times until you reach the desired look of fullness.
* Curls - If your subject has curls, you should treat each curl as a separate object with its own darks, lights, and highlights. At the same time, make sure that each curl fits into the overall layout of the hair. This means, for example, that a particular curl should flawlessly connect to its neighbors.
* Shadows - Often the hair cast a few shadows onto the forehead. These cast shadows should always be rendered in the correct value. You will be surprised how much they contribute to the realistic appearance of the hair and the subject in general. They very much help to show the fullness and three-dimensionality of the hair.
* Forehead - The forehead, like anything else, has a certain value. When the hair falls over the forehead, it is important to apply the same forehead value to the areas of the forehead that are visibly located under the hair. If you leave these areas white, you will loose a lot of realism.
* Gray Hair - The illusion of gray or white hair is created through using pencil strokes sparingly and through more blending with a tortillon or a paper tissue. A soft and silky look can be created by using the kneaded eraser to lift out the appropriate.
Much more can be said about the drawing of hair. This includes such subjects as hairstyles, men's versus women's hair, thin hair, hair color, etc. However, the above remarks will suffice to set you on the right path. Later, you can always consult an advanced work on hair drawing.
Remi Engels, Ph.D., is a pencil portrait artist and oil painter. He is also the author of a popular Pencil Portrait Drawing Course. Get Your Free copy here: Remi's Pencil Portrait Drawing Course while supplies last.
Article Source: Pencil Portrait Drawing Tips on Hair

